接續
接續上一篇的 向 NachOS 4.0 作業進發 (1),我們繼續完成排程處理,在原始的 NachOS 4.0 中,基礎排程是 Round-robin,它的運作方式藉由定時呼叫 threads/alarm.h 中的 Alarm::CallBack(),而呼叫的時脈來源設定為 machine/stats.h 中的 const int TimerTicks = 100; 決定,數值越小表示呼叫頻率越高,置換的次數就會上升。
目標 Scheduler
- FIFO (FCFS) 先來先服務
- SJF 最短工作優先
- Priority 最小優先權優先
- RR (Round-robin)
- multi-level queue 最後的大魔王
開始
第一步 - 測試
先來說說怎麼測試自己的寫的代碼正確性,不然怎麼寫都只是理論腦補,雖然會動,但是不知道是否寫對。
第一種方式為下達
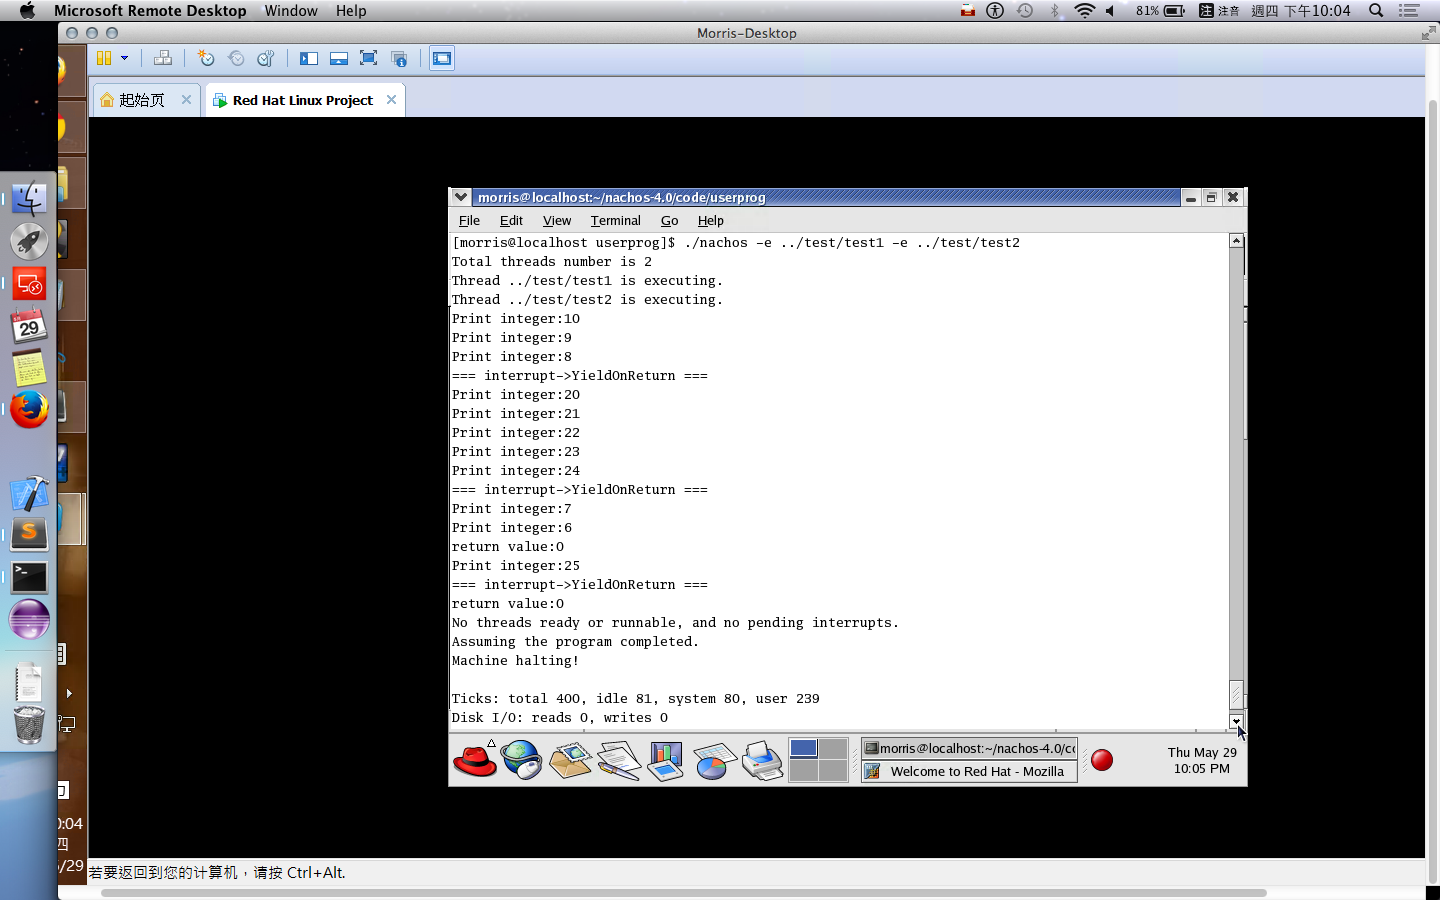
$ ./nachos -e ../test/test1 -e ../test/test2 ... 多個這樣必須自己設置優先權、Burst Time,這方面撰寫方式有兩種,其一是來亂,其二是較為正式,而在 Burst Time 的計算又分成兩種,一是執行前已知、二是執行時猜測。
其一來亂寫法,
$ ./nachos -e ../test/test1 -e ../test/test2 ... 多個不改變原本的的執行方式,直接在代碼中決策 thread fork 出來時所擁有的優先權和 Burst Time。
12345678910111213static int testPriority = 0;voidThread::Fork(VoidFunctionPtr func, void *arg){// morris addtestPriority++;if(testPriority == 1)setPriority(64);else if(testPriority == 2)setPriority(128);elsesetPriority(64);// end morris add
因此,您可能會寫出以上的代碼,當然我不建議這麼寫,雖然是一種測試方式,但這並不好,一開始就這麼錯得相當離譜。其二寫法,增加下達參數,不過這些參數格式要去查閱一下他們的參數傳遞建造,我想會寫成大概的樣子為
$ ./nachos -e ../test/test1 -pw 64 -e ../test/test2 -pw 128 ...多個為了不增加工作量,這裡就沒有親自去實作。某方面來說,可能要寫很多 small program 進行測試,並且撰寫時還要預測會跑多久,這難度會稍微提高。
第二種方式按照軟工的寫法
來寫 test code 吧!如果細心一點,就會看到相關的Class::SelfTest()在很多 class 都有的,因此我們需要把 test code 寫到 SelfTest 中被呼叫。因此,不需要有實體的 process 運行,只是單純地測試我們寫的 scheduler 的排程順序是否正確。threads/thread.cc 1234567891011121314151617181920212223242526voidthreadBody() {Thread *thread = kernel->currentThread;while (thread->getBurstTime() > 0) {thread->setBurstTime(thread->getBurstTime() - 1);kernel->interrupt->OneTick();printf("%s: remaining %d\n", kernel->currentThread->getName(), kernel->currentThread->getBurstTime());}}voidThread::SchedulingTest(){const int thread_num = 4;char *name[thread_num] = {"A", "B", "C", "D"};int thread_priority[thread_num] = {5, 1, 3, 2};int thread_burst[thread_num] = {3, 9, 7, 3};Thread *t;for (int i = 0; i < thread_num; i ++) {t = new Thread(name[i]);t->setPriority(thread_priority[i]);t->setBurstTime(thread_burst[i]);t->Fork((VoidFunctionPtr) threadBody, (void *)NULL);}kernel->currentThread->Yield();}
請自行在class Thread增加setPriority(),setBurstTime(),SchedulingTest()… 等 method header and body。threads/thread.h 1234567891011121314151617181920212223class Thread {private:...public:...// morris addvoid setBurstTime(int t) {burstTime = t;}int getBurstTime() {return burstTime;}void setStartTime(int t) {startTime = t;}int getStartTime() {return startTime;}void setPriority(int t) {execPriority = t;}int getPriority() {return execPriority;}static void SchedulingTest();private:// some of the private data for this class is listed above// morris addint burstTime; // predicted burst timeint startTime; // the start time of the threadint execPriority; // the execute priority of the thread...};
接著是需要 call testcode 加入到 ThreadedKernel 中。threads/kernel.cc 12345678910111213voidThreadedKernel::SelfTest() {Semaphore *semaphore;SynchList<int> *synchList;LibSelfTest(); // test library routinescurrentThread->SelfTest(); // test thread switchingThread::SchedulingTest();// test semaphore operationsemaphore = new Semaphore("test", 0);...}
因此我們可以利用單一 module 就能進行檢查。$ cd code/threads $ ./nachos但是這種方式,並沒有決定我們要測試哪一種類型的 scheduler,額外需要設定參數,讓其選擇建造哪一種的
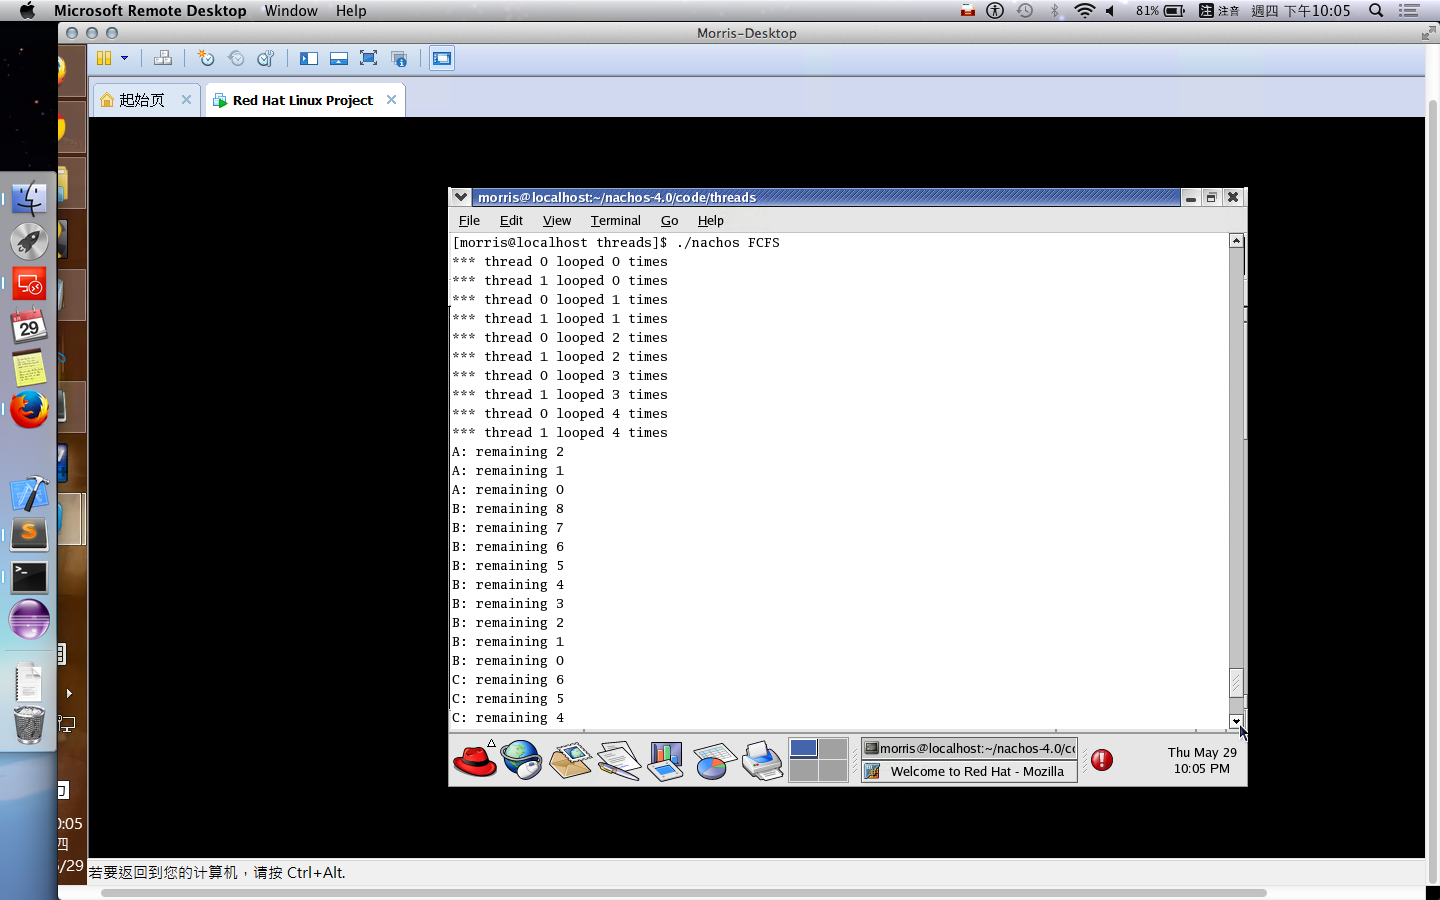
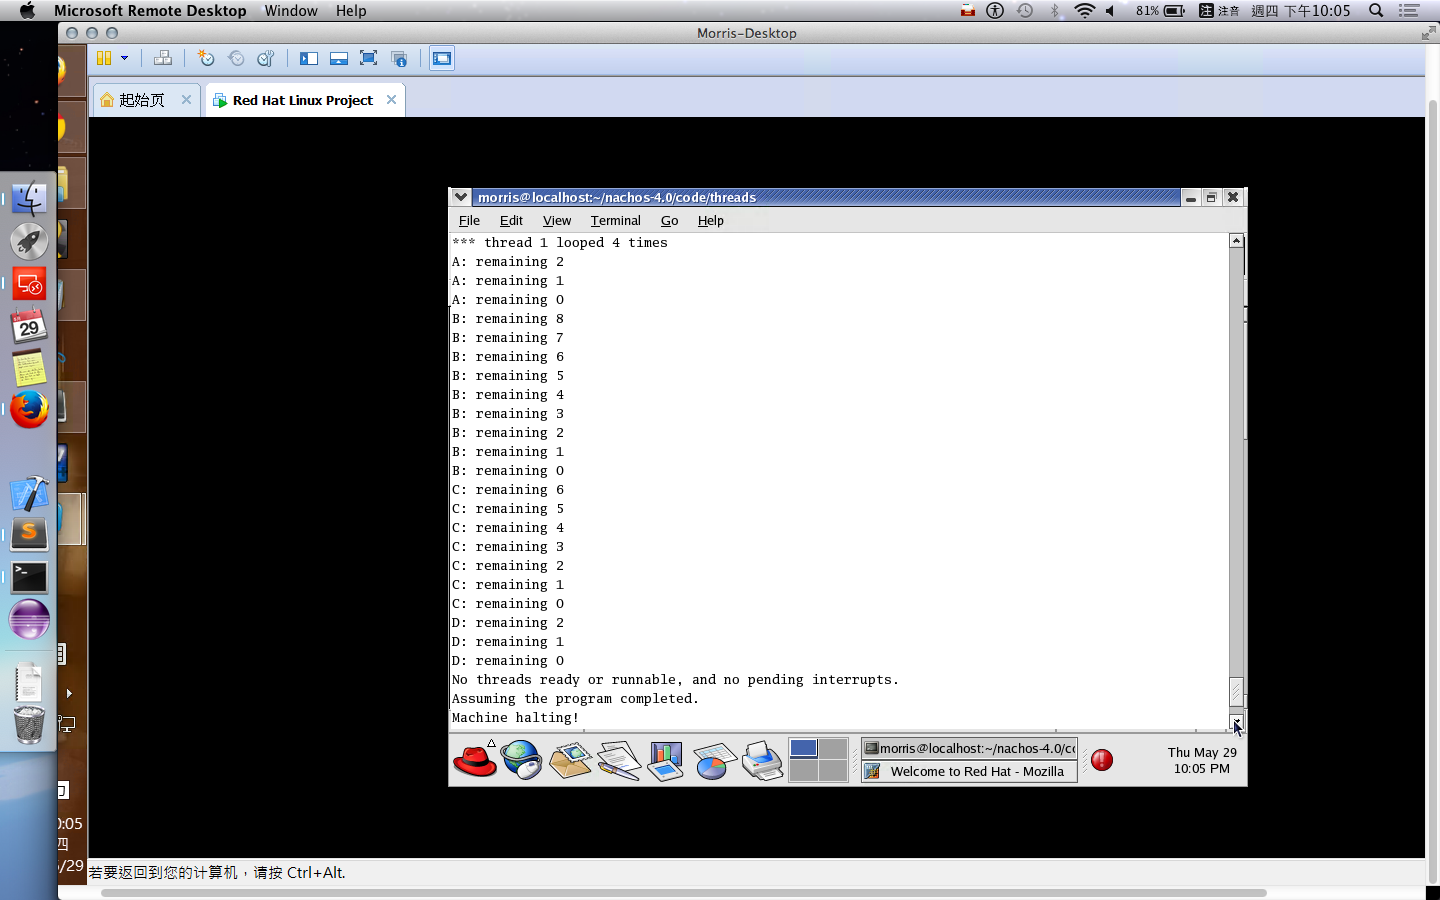
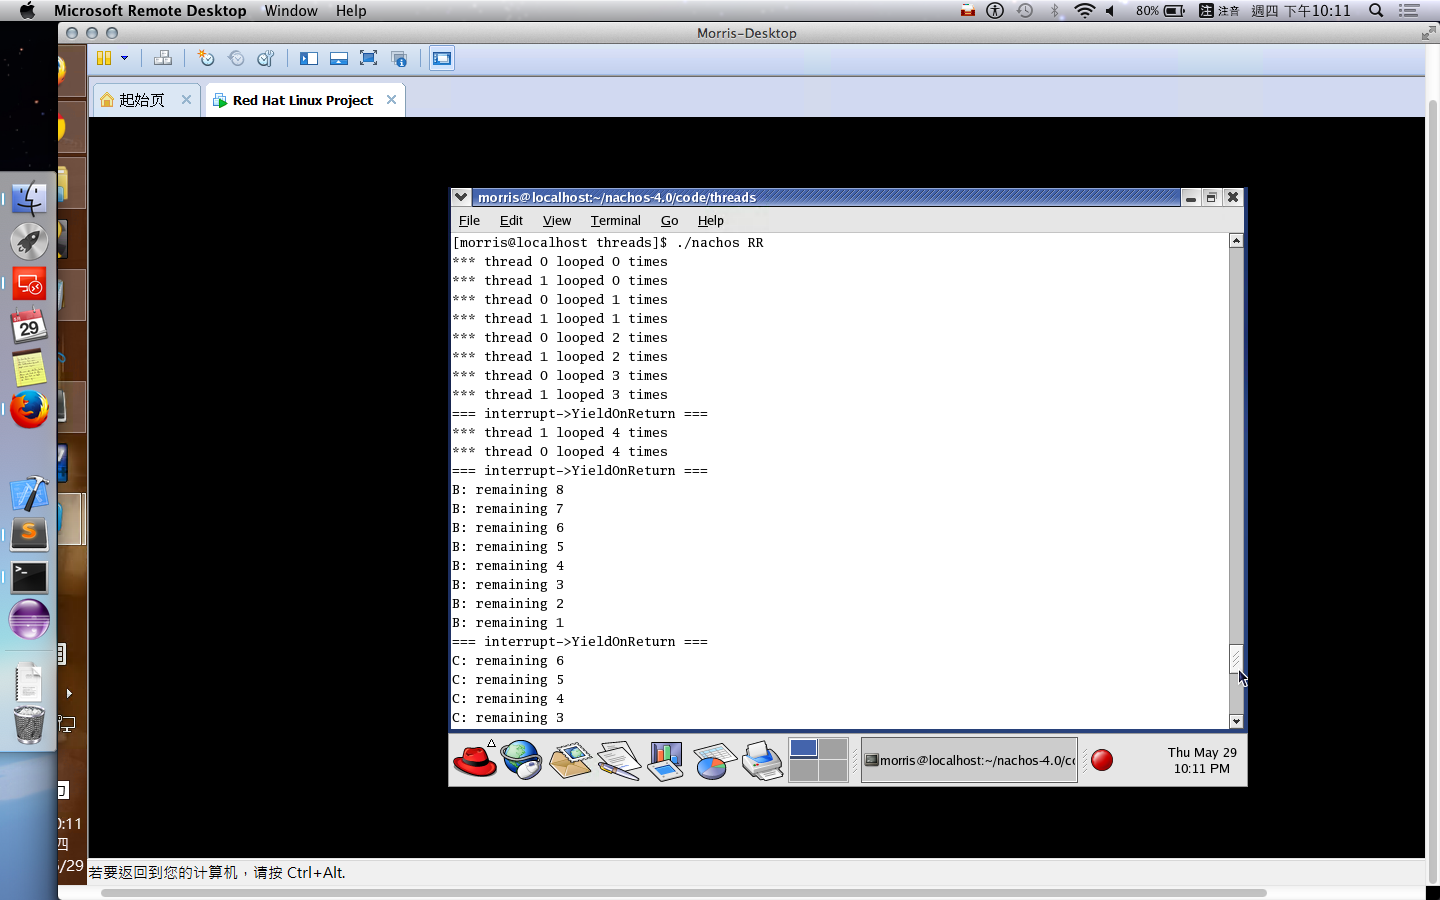
readyList(Thread*)$ cd code/threads $ ./nachos FCFS $ ./nachos SJF $ ./nachos Priority $ ./nachos RR預計要修成如上述的測試方式。
threads/main.cc 1234567891011121314151617181920212223242526272829intmain(int argc, char **argv){...debug = new Debug(debugArg);DEBUG(dbgThread, "Entering main");//SchedulerType type = RR;if(strcmp(argv[1], "FCFS") == 0) {type = FIFO;} else if (strcmp(argv[1], "SJF") == 0) {type = SJF;} else if (strcmp(argv[1], "PRIORITY") == 0) {type = Priority;} else if (strcmp(argv[1], "RR") == 0) {type = RR;}//kernel = new KernelType(argc, argv);kernel->Initialize(type);CallOnUserAbort(Cleanup); // if user hits ctl-Ckernel->SelfTest();kernel->Run();return 0;}
第一步測試撰寫就這麼結束,比起撰寫新的 code,不會進行測試也是徒勞。
雖然這麼說,實際運作也是先寫 code 再寫 test code,因為當時還不太懂這些,所以如果已經先寫了一些也不用難過,大家都是這麼走過來的。
如果不知道怎麼執行,哪還有什麼撰寫的欲望,如果不知道怎麼測試,那就是在黑暗中漫步。
第二步 - 撰寫
在撰寫開始前,如果使用走第一種測試方式的人,需要將實體記憶體用大一點,否則需要實作虛擬記憶體的 context-swith。
|
|
若完成以上的修改,在 /userprog 下,執行
就不會跑出 segment fault 。
如果有機會查閱其他代碼,很常見會把 List<Thread *> *readyList; 改成 SortedList<Thread *> *readyList; 但是其實不用的,可以利用多形來完成,畢竟 SortedList 繼承 List。因此是不需要更動的。
接著,我們使用多形,在建構子中決定要用哪一種類型的排程,並且宣告相對應的 compare function,參照如下。
上述的寫法是因為沒有辦法宣告 default argument value for class。
如果需要搶先 (Preemptive) 設計,則在 Alarm::CallBack() 決定是否要呼叫 interrupt->YieldOnReturn() 查看是否有更需要優先的 process 要執行。
在 Burst Time 計算上,如果採用運行時估計,可以在以下代碼中進行計算。kernel->stats->userTicks 是執行 user program 的時間累加器 (也存有一個 system program 的時間累加器,運行 thread context-free, thread scheduling … 等時間用途。)
其實到這裡已經完成,接下來就放幾張測試結果。
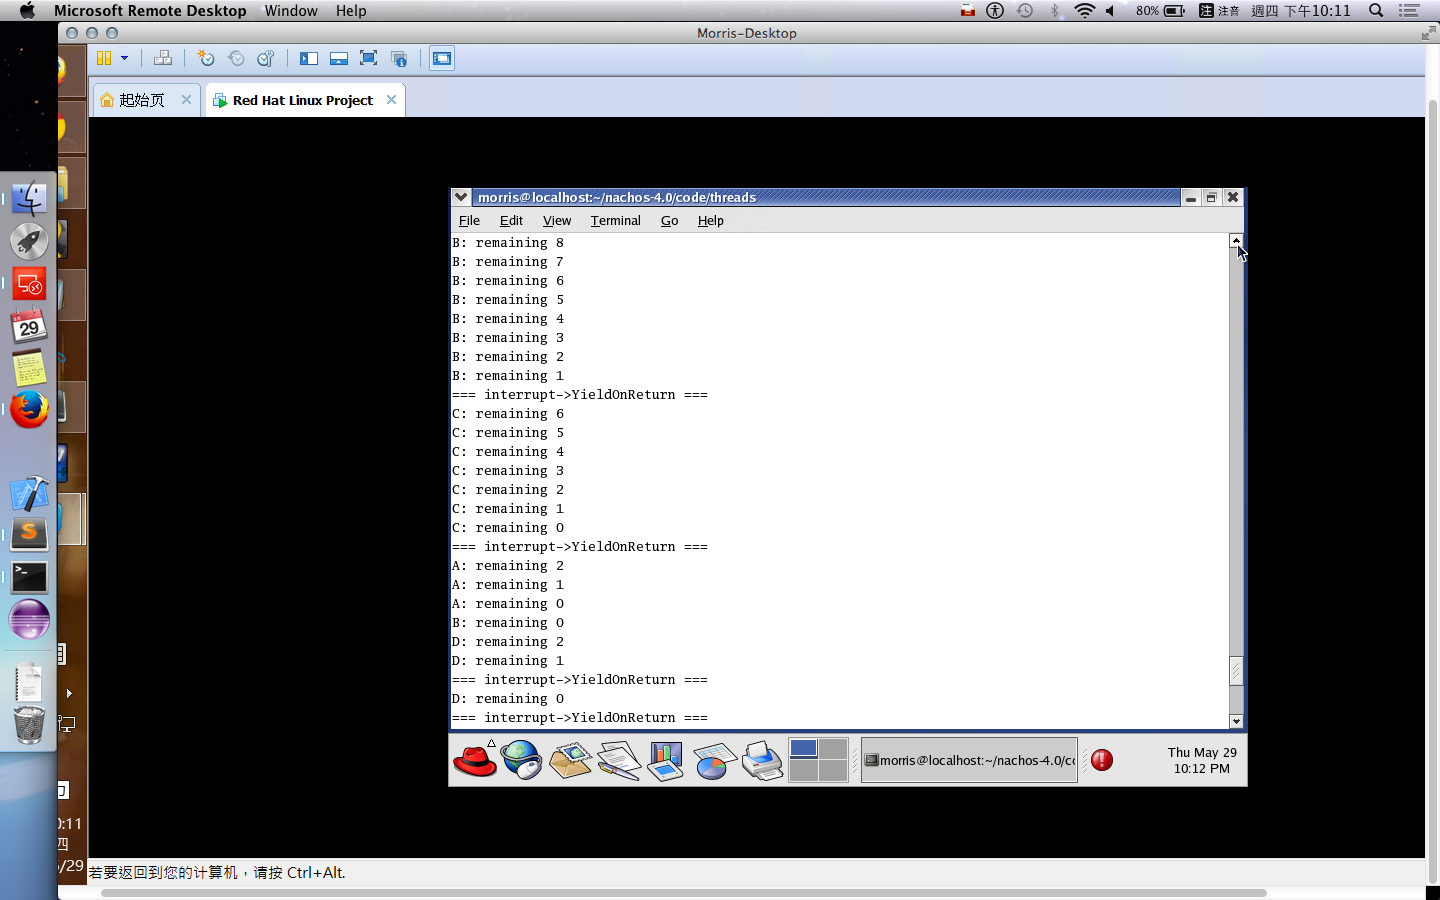
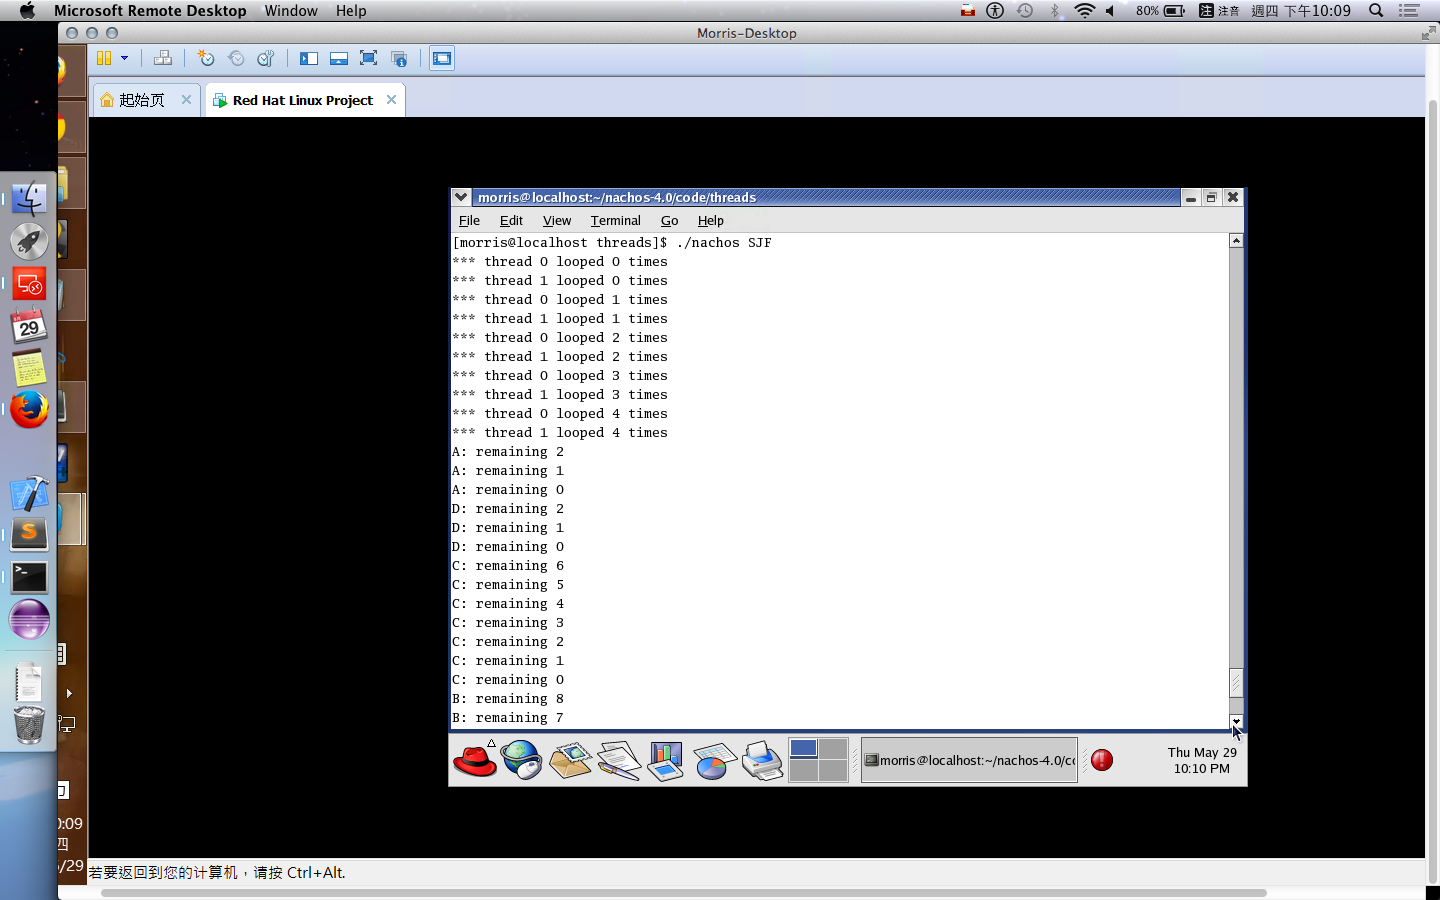
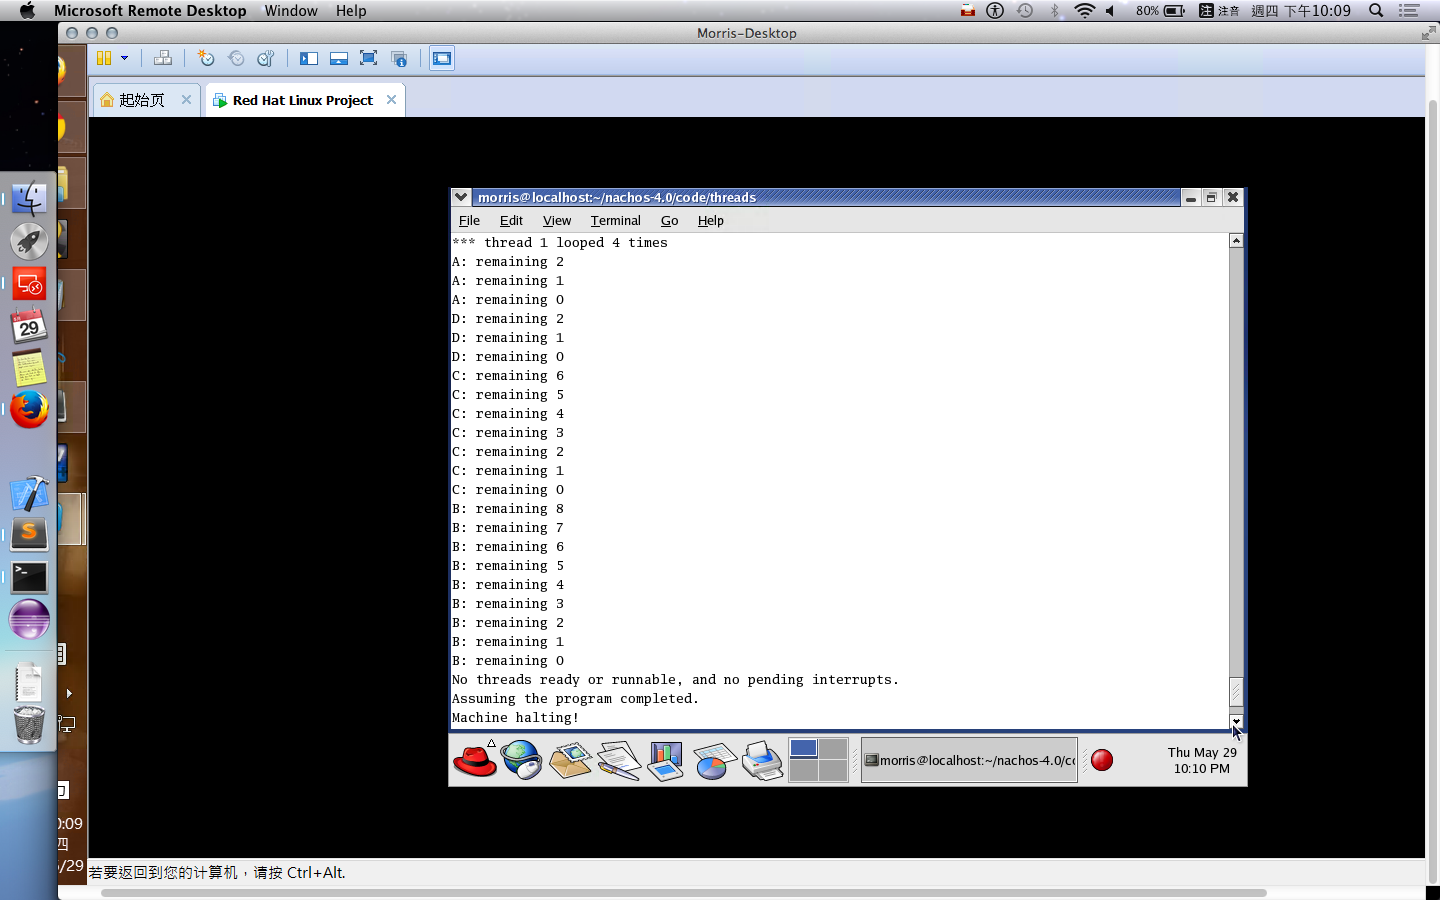
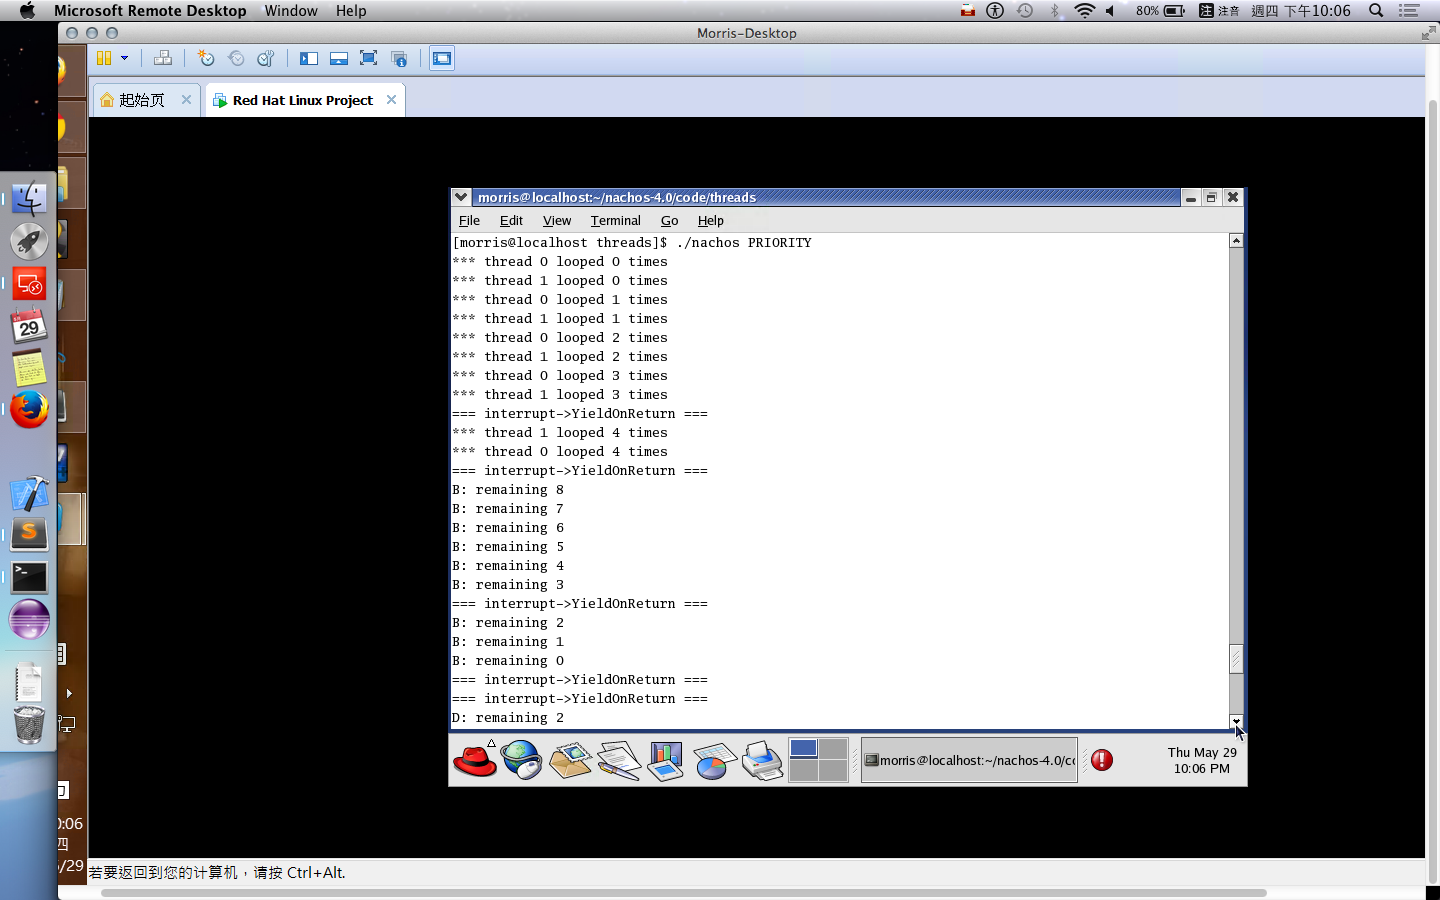
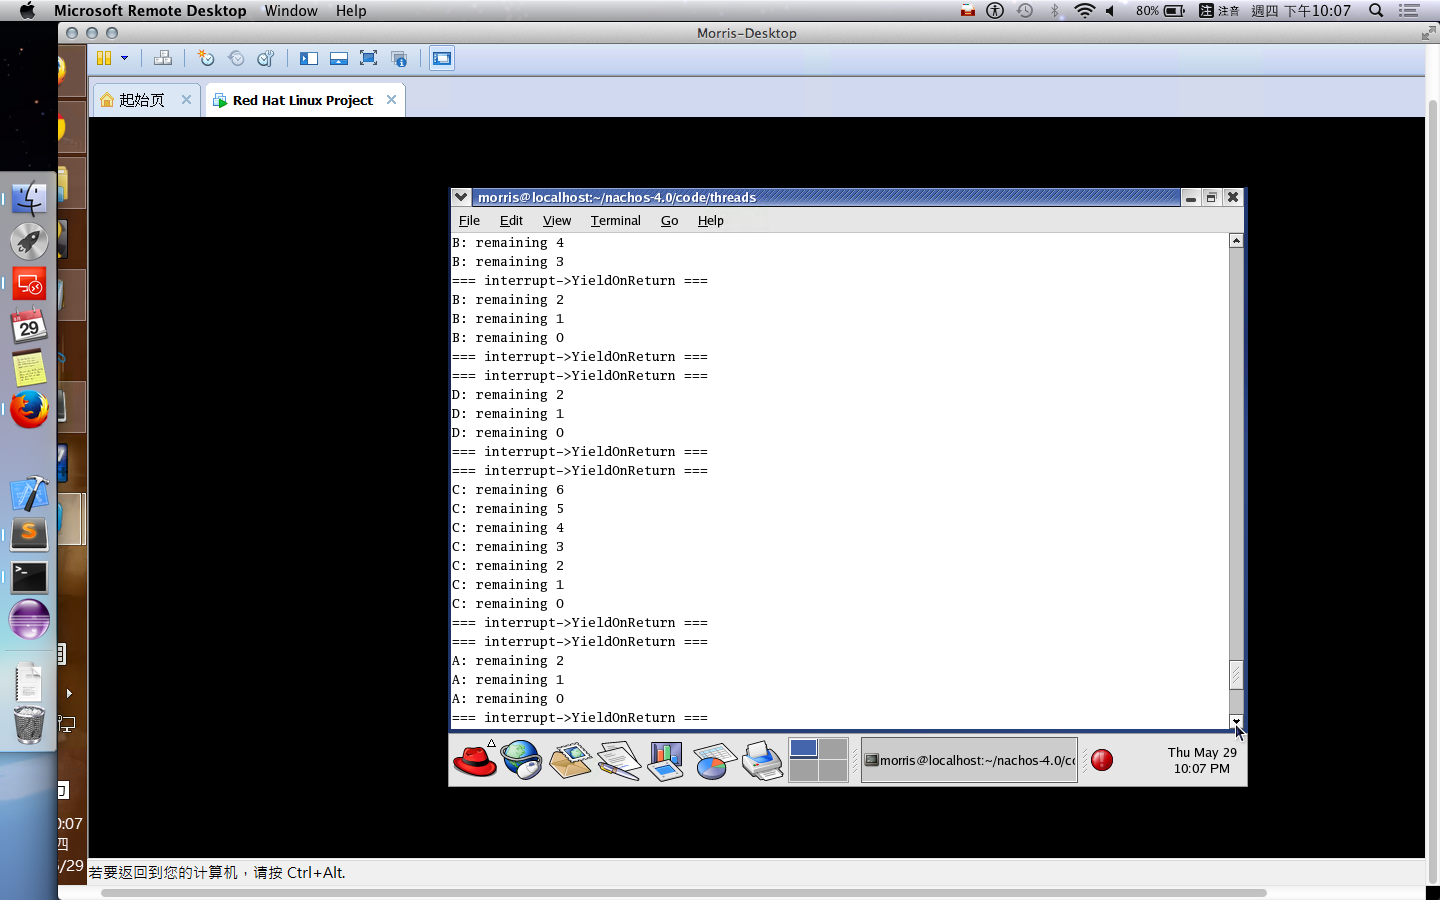
最後
如果在
編譯時發生錯誤,想必是兩個地方的 Initialize() 發生錯誤,所以請參照以下代碼進行修改。這問題是發生於我們在 /threads 下修改 main.cc 的關係,所以必須在每一個 kernel 宣告地方都給一個決定 scheduler 類型的參數。
其一,
其二,
其三,
其四,
致網路資源
感謝網路上前人們所遺留的遺產。雖然在看不懂的文字中摸索,但仍抓到了一點線索。
我一無所有,直到見到了你們。